Run OXRecorder on your own server
OX Self-Host · purpose, setup walkthrough and FAQ
A self-hosted instance is an OX service that runs on a Mac or Ubuntu server you control. Your OX devices send audio to that server over your local network, and you keep managing them from the OX cloud portal.
Your recordings stay private. They are stored only on your server, never uploaded to the OX cloud, and only the accounts you create can open them.
This guide explains what a self-hosted instance does, what stays on your server, and how to create one step by step.
What is a self-hosted instance?
By default, OX devices stream audio and upload recordings to the OX cloud. A self-hosted instance moves that work onto your own server. It receives live audio and recordings from assigned devices over your LAN and stores them on the server.
The instance includes its own web portal, user accounts and API. Devices remain owned by your cloud account, so you still name, configure, schedule, update and monitor them from the cloud portal.
Choose a self-hosted instance when you:
- need recordings to stay private, on your own hardware and out of the cloud;
- want devices to keep recording to a local server while the internet connection is down;
- want local accounts and an API on your own server for in-house systems;
- have many devices on one site and want audio to travel over the LAN instead of the internet.
How a self-hosted instance works
Record · stream over the LAN
Portal · PSSP broker · storage
Ownership · settings · monitoring
The server runs the self-hosted portal and API, an encrypted PSSP broker for device traffic, background services for recordings, and a private database. The installer sets all of this up for you; you do not install the components one by one.
The server connects out to the OX cloud over signed HTTPS. It does not need an inbound connection from the internet.
What is shared with the cloud
| Synchronized with the cloud | Stays on your server |
|---|---|
| Device health, status and telemetry | Live audio and recordings from assigned devices |
| Device settings, schedules and update status | Self-hosted user passwords and API tokens |
| Instance health, alerts and diagnostic reports | Encryption keys of the instance |
Notifications and email alerts are delivered by the cloud portal. The self-hosted portal shows the data on your server.
Security and privacy
A self-hosted instance is built for organizations whose recordings must stay private. You own the server, the storage and the list of people who can listen.
- Recordings never leave your server. Live audio and recordings from assigned devices are stored only on your server. They are not uploaded to or kept in the OX cloud, so OX has no copy.
- Only people you authorize can listen. Recordings are available only to the administrator, operator and viewer accounts on your self-hosted server and to the API tokens you issue. Viewers see only the devices granted to them. These accounts are separate from cloud accounts.
- Credentials stay with you. Passwords are never stored in plain text, and API tokens and encryption keys stay on your server. The cloud cannot change your recovery administrator.
- Encrypted in transit. Devices send audio to the server over encrypted PSSP, and browsers and the API connect over HTTPS. The server and the OX cloud authenticate each other with signed messages.
- Only management data is synchronized. The cloud receives device status, settings, schedules and update results, never audio or recordings. See What is shared with the cloud.
Benefits and limits
Benefits
- Keeps working offline. After setup, the self-hosted service runs independently. Devices keep recording to it when the internet is down; cloud management requests wait until the connection returns.
- One place to manage devices. Ownership, settings, schedules and firmware updates stay in the cloud portal, alongside your cloud devices.
- Local accounts and API. Create administrator, operator and viewer accounts and API tokens on your server for in-house tools.
- Safe updates. Service updates take a backup, run health checks and roll back automatically if the new version fails.
Limits
- Transcription, plugins and teams are not available on a self-hosted instance.
- Initial setup requires an internet connection to the OX cloud.
- One instance supports up to 1,000 devices.
- Existing cloud recordings and recordings on device SD cards are not moved when a device is assigned.
- If the server is unreachable, devices temporarily fall back to the OX cloud. See Security and privacy.
Requirements
| Item | Requirement |
|---|---|
| Operating system | macOS (Apple silicon or Intel) or Ubuntu Linux (x64 or ARM64). Windows is not supported. |
| Processor | Intel and AMD x64 processors must support AVX. Apple silicon and ARM64 servers are supported. |
| Software | macOS needs Homebrew; the installer adds the container runtime it needs. On Ubuntu, the installer installs Docker Engine if it is missing. |
| Disk space | About 700 MB for database images, plus space for your recordings. |
| Network | A fixed LAN address that your devices can reach, and outbound HTTPS to portal.oxrecorder.cn. |
| Clock | Automatic time synchronization. The server clock must be within 5 minutes of the cloud. |
| Account | An OX cloud account that owns the devices you will assign. |
| Firmware | Device firmware that supports self-hosted assignment. Update your devices from the cloud portal first. |
Network ports
The installer picks free ports automatically and opens the required LAN firewall rules on Ubuntu. If your network has another firewall, allow these ports from your devices and browsers to the server:
| Port | Used for |
|---|---|
3080 TCP (or next free) | Self-hosted portal and API (HTTPS) |
3081 TCP (or next free) | One-time setup page during installation |
6689 TCP and UDP | Encrypted device traffic (PSSP) |
6691 TCP | Device management connection |
A Mac used as a server should stay plugged in and awake. On Ubuntu, the installer enables server mode, which prevents sleep and automatic reboots.
Create a self-hosted instance
Setup moves between three places: the cloud portal, a terminal on your server and the setup page that the installer opens. It takes about 15 minutes. Keep each window open until setup is complete.
- Open Self-host servers in the cloud portal. Sign in to portal.oxrecorder.cn, open your account menu and select Self-host servers. The setup wizard opens for your first server; if you already have one, click Create server.
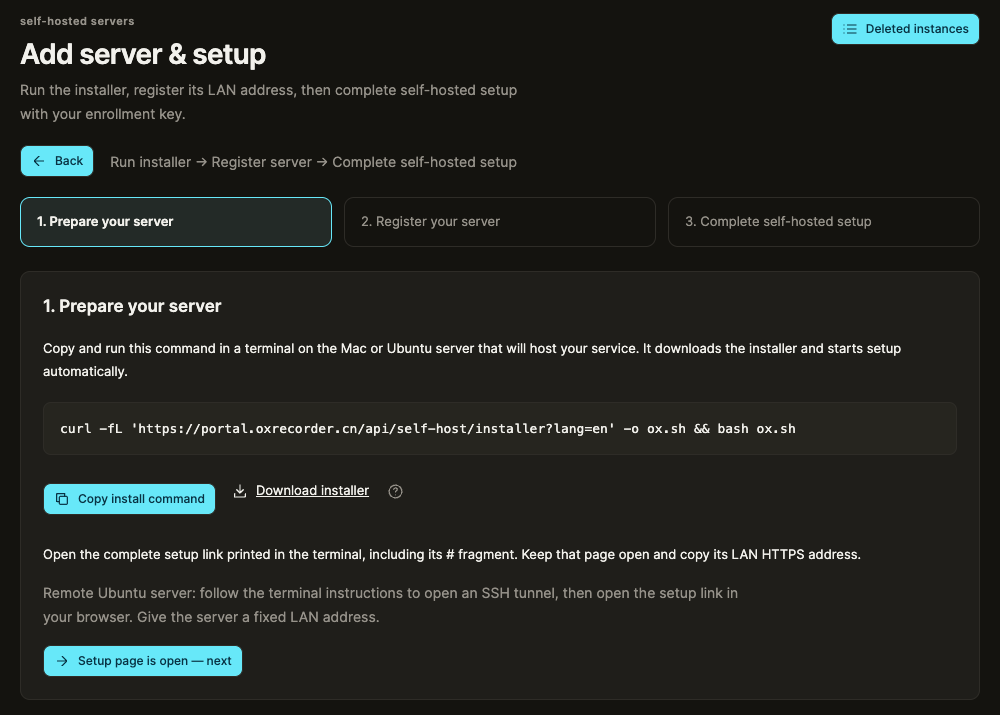
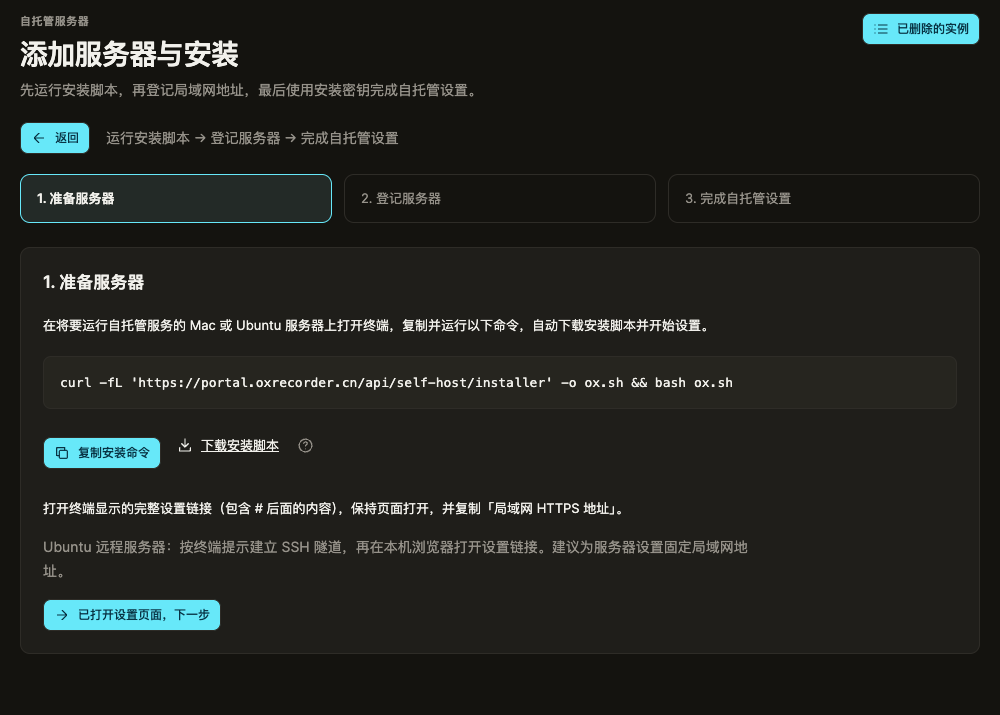
- Run the installer on your server. Click Copy install command, open a terminal on the Mac or Ubuntu server and paste the command:
curl -fL 'https://portal.oxrecorder.cn/api/self-host/installer?lang=en' -o ox.sh && bash ox.shcurl -fL 'https://portal.oxrecorder.cn/api/self-host/installer?lang=zh' -o ox.sh && bash ox.shThe installer uses the same language as this page; choose Change language in its menu to switch. In the installer menu, choose Create a new instance with the arrow keys and press Enter. The installer checks your system and installs what it needs. When asked, enter the computer's administrator password. On Ubuntu, read the server mode summary and accept it to continue.
OX Self-Host · Instances

  › Create a new instance
    Manage an existing instance
    Change language
    Help
    Exit
OX 自托管 · 实例
› 创建新实例
管理已有实例
切换语言
帮助
退出- Open the setup page. When the installer finishes preparing, it prints a setup link such as
https://127.0.0.1:3081/#…. Open the complete link, including the part after#. Your browser warns about the certificate the first time; continue to the page.
On a remote Ubuntu server, follow the terminal instructions to open an SSH tunnel first, then open the link in the browser on your own computer.
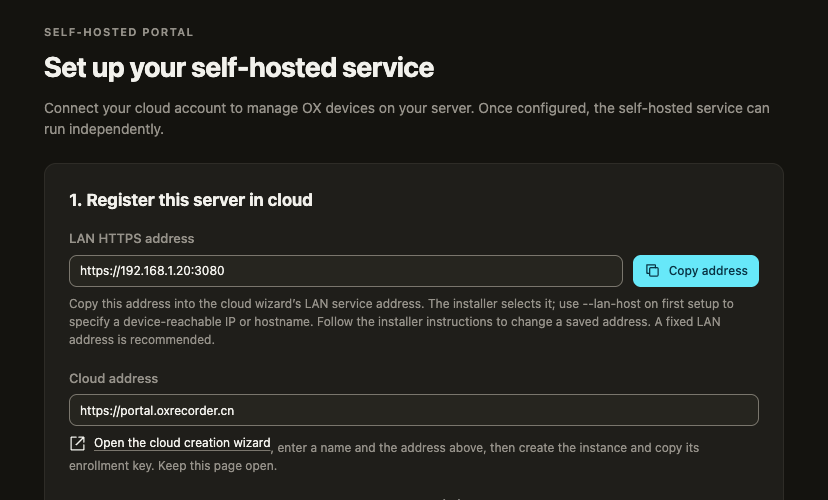
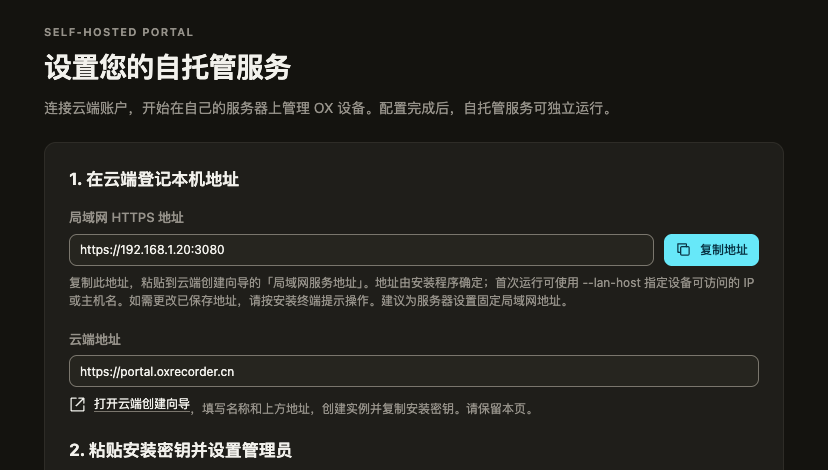
- Copy the LAN HTTPS address. On the setup page, click Copy address. Return to the cloud wizard and click Setup page is open — next.
- Register your server in the cloud. Enter a name for the instance and paste the address into LAN service URL. Do not use the
127.0.0.1address of the setup page. Leave External HTTPS API URL empty unless you publish the API through your own trusted HTTPS domain. Click Create and generate enrollment key.
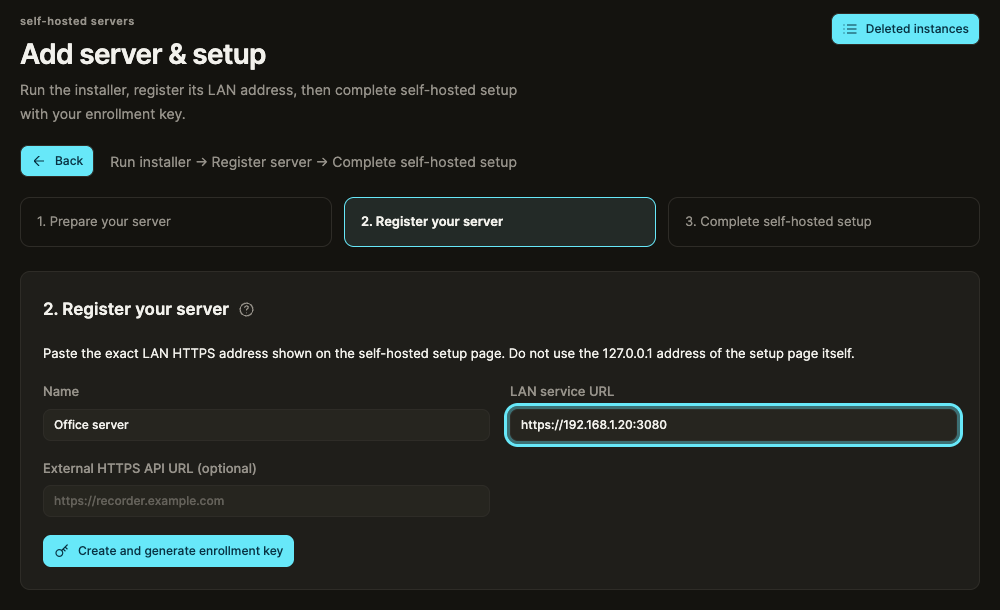
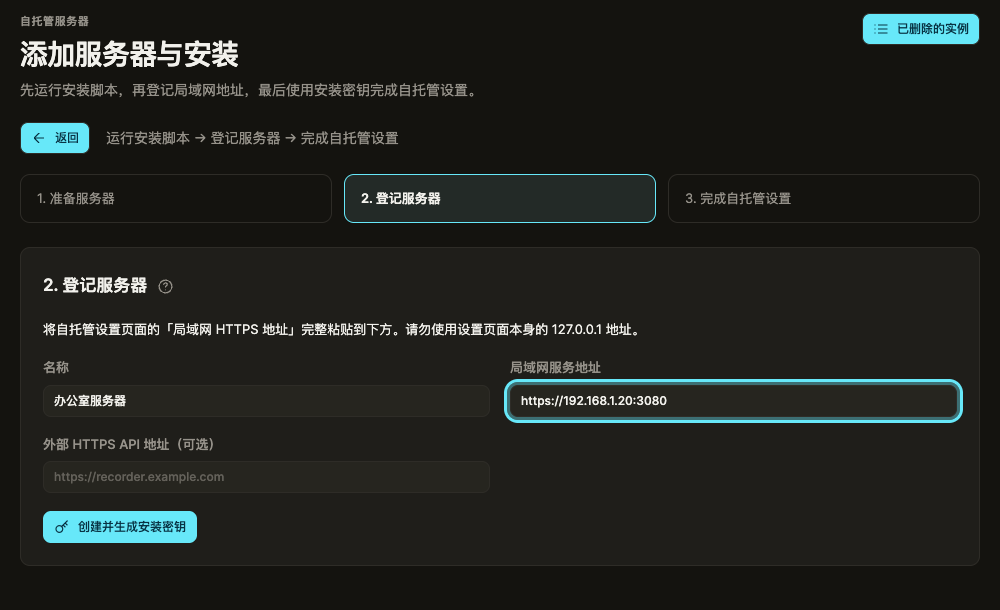
- Copy the enrollment key. The cloud shows an enrollment key once. It is valid for 24 hours. Click Copy enrollment key.
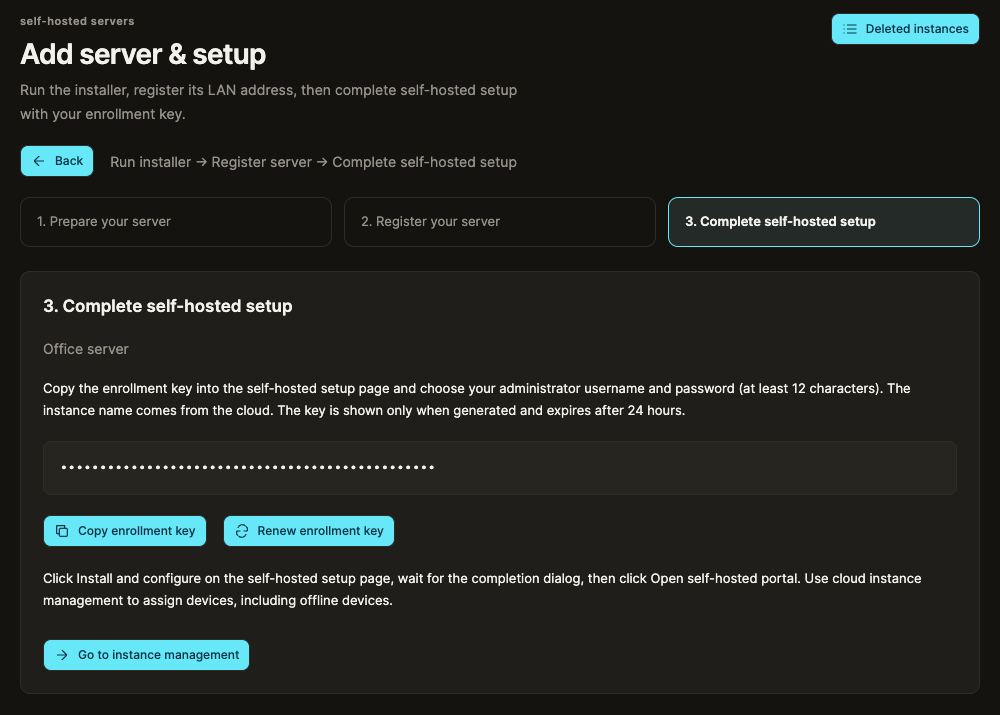
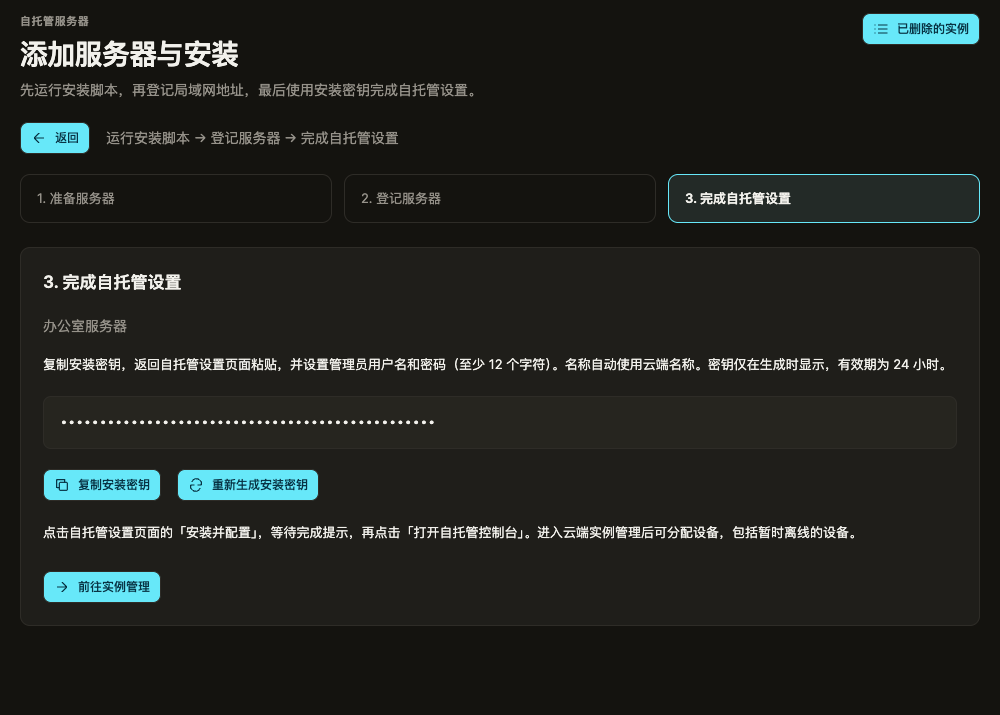
- Finish setup on the server. Return to the setup page and paste the key into Enrollment key. Choose an administrator username and a password of at least 12 characters, then click Install and configure.
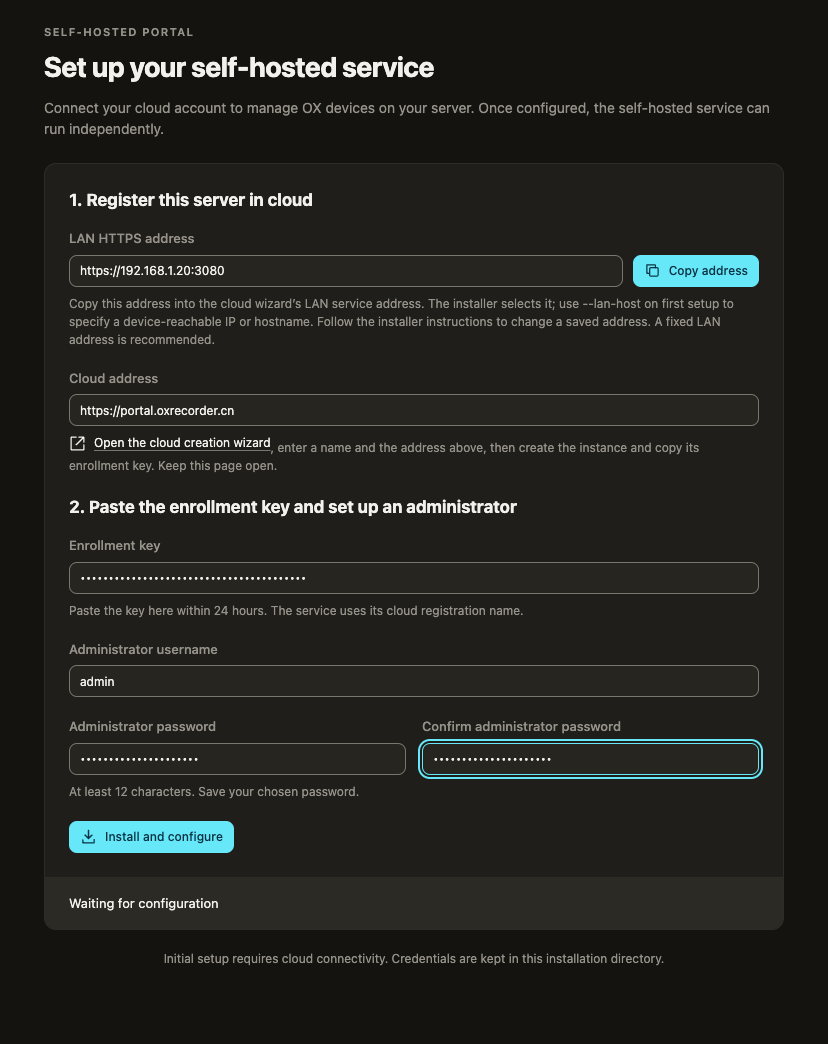
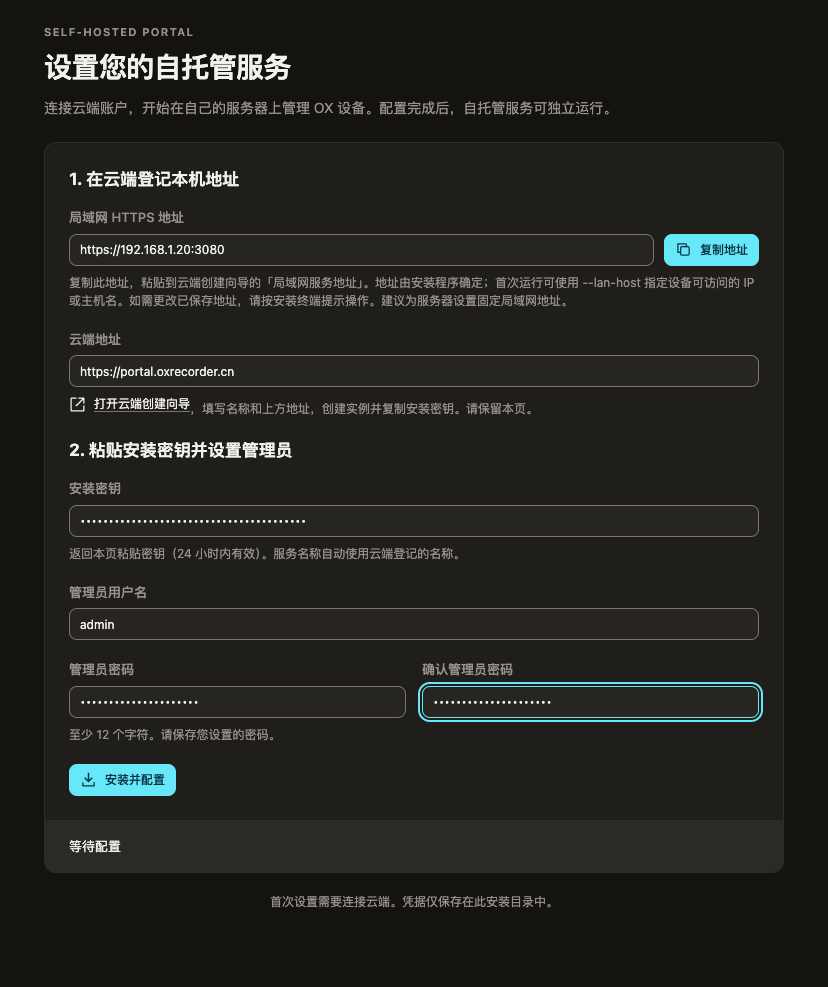
If the page shows Administrator password required, switch to the terminal, type the computer's administrator password and press Enter. Keep the page open while the database and services start; this can take several minutes the first time.
- Open the self-hosted portal. When Self-hosted setup complete appears, click Confirm and open self-hosted portal and sign in with the administrator account you just created.
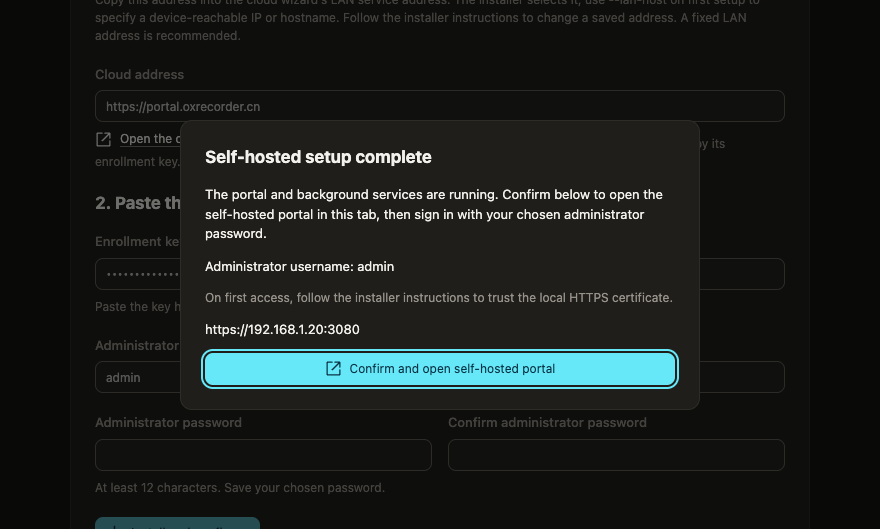
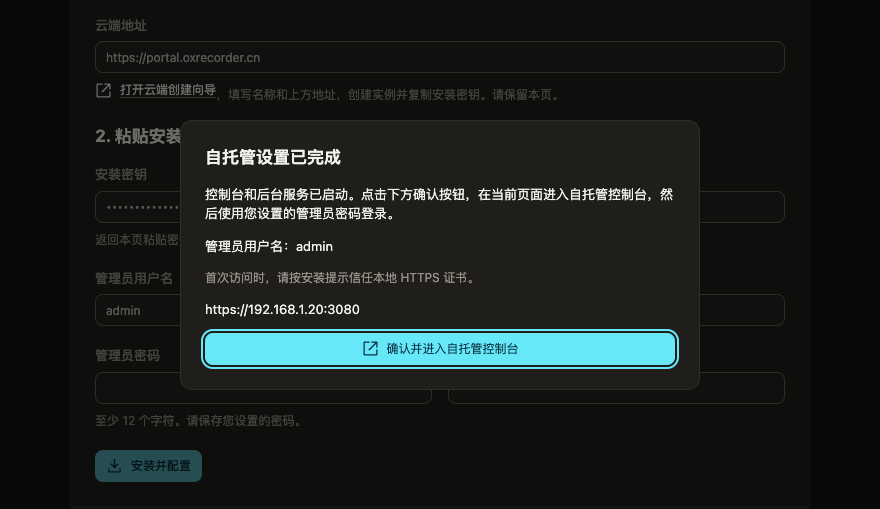
- Assign devices. In the cloud portal, click Go to instance management and open the Devices view of your instance. Select devices under Cloud devices and click Assign selected devices.
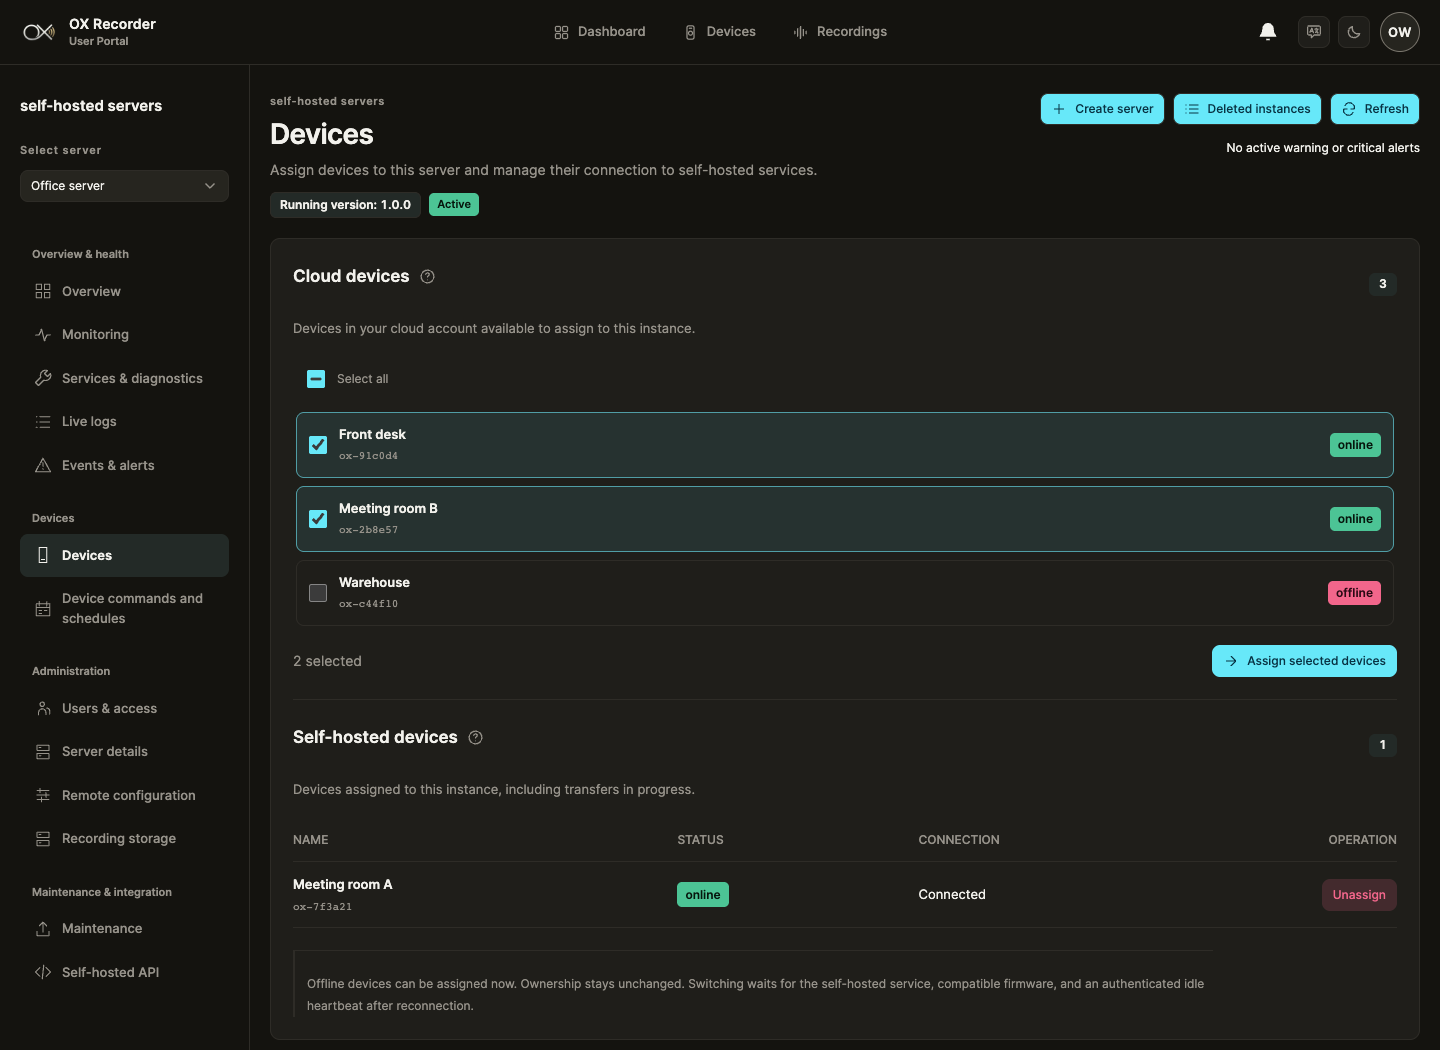
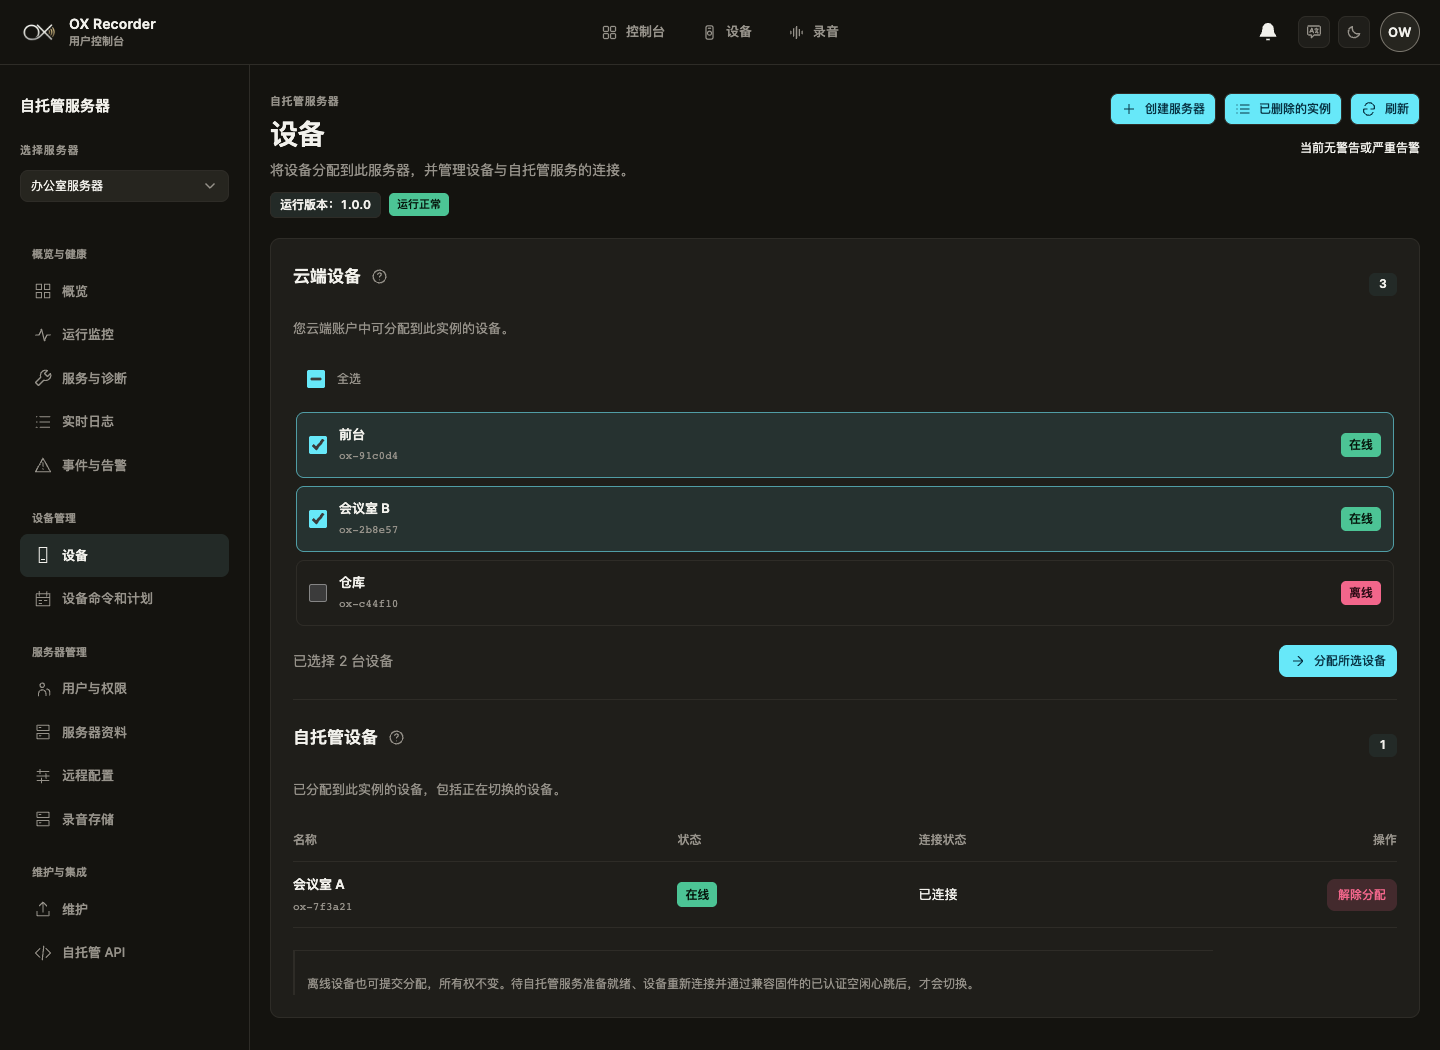
Device ownership does not change. Offline or busy devices can be assigned now; each one switches to your server after it reconnects and is idle. Assigned devices then appear under Self-hosted devices and in the self-hosted portal.
Manage your instance
Self-hosted portal
Open the LAN HTTPS address in a browser on your network. The self-hosted portal shows the dashboard, devices and recordings on your server. Administrators can create user accounts and API tokens under administration.
Cloud instance management
In the cloud portal, Self-host servers shows each instance's status, devices, users, logs, events and alerts. From here you can also change recording schedules, edit device settings and install service updates.
Service updates
New versions never install automatically. Choose when to update: when the instance is idle, immediately, or in a maintenance window. The update backs up the service, installs the new version and checks its health. If the check fails, it rolls back automatically.
Return a device to the cloud
Use Unassign on a self-hosted device in cloud instance management. The device moves back to the OX cloud when it is reachable. Recordings that are already on your server stay there.
Installer menu
Run the installer again on the server and choose Manage an existing instance to:
- Resume service (keep data) after a restart or a failed start;
- start, stop or restart services with Service controls;
- view status and live logs;
- Restore cloud registration (keep data) for an instance that was removed from the cloud;
- Discard incomplete installation if setup did not finish.
To check an instance without changing anything, run:
bash ox.sh --status --language enbash ox.sh --status --language zhDelete an instance
In cloud instance management, choose Delete instance. First return all devices to the cloud. Then choose whether to keep the data on your server or remove it, and type the instance name to confirm. A deleted instance can be restored with a key from Deleted instances, valid for one hour, using Restore cloud registration in the installer.
Frequently asked questions
Can OX staff access my recordings?
No. Recordings on your server are never copied to the OX cloud, so OX has no copy to open. Access is limited to the accounts and API tokens you create on your server. Only recordings made during a cloud fallback are stored in the cloud.
Is any audio uploaded to the OX cloud?
Not while your server is reachable. New live audio and recordings from assigned devices go to your server. If a device cannot reach the server for about 60 seconds, compatible firmware falls back to the cloud and new recordings go there until the server is back. Recordings made before assignment stay where they are.
What happens if the internet goes down?
Devices keep recording to your self-hosted server, and the self-hosted portal keeps working on your LAN. The cloud portal shows the instance as offline, and changes made in the cloud are applied when the connection returns.
What happens if the server goes down?
Assigned devices fall back to the OX cloud after about 60 seconds and switch back automatically once the server is reachable again. Audio that was streaming during the outage may not be recoverable; recordings on device SD cards are kept.
Can I install it on Windows or in a Docker container?
No. Install on macOS or Ubuntu directly. The installer manages its own containers for the database; a generic Docker container is not a supported host.
Why does my browser warn about the certificate?
The self-hosted server uses its own HTTPS certificate on your LAN. Follow the installer instructions to trust it on your computer. Devices verify the certificate automatically.
The enrollment key is invalid or has expired.
Enrollment keys are valid for 24 hours and can be used once. In the cloud wizard, click Renew enrollment key, then paste the new key into the setup page. Also check that the LAN service URL in the cloud matches the address on the setup page exactly.
The setup page says the session expired.
Open the complete setup link from the terminal, including the part after #. Opening only the address and port is not enough. You do not need a new enrollment key.
The installer stops with “Illegal instruction”.
The processor does not support AVX, which the database requires. This affects some older or low-power Intel processors such as certain Celeron models. Use a computer with a newer x64 processor, Apple silicon or an ARM64 server.
Setup fails while preparing the database.
Check the terminal for details. Common causes are no network connection, low disk space or a stopped container runtime. Fix the problem and click Retry installation on the setup page; you do not need to discard the instance.
Can other systems use the self-hosted API?
Yes. An administrator can create API tokens in the self-hosted portal. To reach the API from outside your LAN, publish it behind your own trusted HTTPS domain and enter that domain as the External HTTPS API URL.
How do I uninstall the self-hosted service?
First return all devices and delete the instance in the cloud portal. Then download and run the uninstaller on the server. Use --dry-run first to see what will be removed:
curl -fL 'https://portal.oxrecorder.cn/api/self-host/uninstaller?lang=en' -o uninstall_self_host.sh
bash uninstall_self_host.sh --dry-run
curl -fL 'https://portal.oxrecorder.cn/api/self-host/uninstaller?lang=zh' -o uninstall_self_host.sh
bash uninstall_self_host.sh --dry-runHow do I remove everything OX installed on my Mac or Ubuntu server?
Run the uninstaller with --remove-docker. It resets the computer and removes everything the OX installer created on it:
- all instance and data directories, including databases, recordings, self-hosted accounts and API credentials;
- OX containers, images and networks, and on macOS the Lima virtual machines;
- startup services (launchd on macOS, systemd on Ubuntu), sudoers rules and the bundled Node.js runtime;
- Docker: the Docker packages on Ubuntu, or Lima and the Docker command-line tools installed with Homebrew on macOS.
On Ubuntu, the sleep and automatic-restart settings the installer changed are restored to their previous state.
# 1. Download the uninstaller and preview what will be removed
curl -fL 'https://portal.oxrecorder.cn/api/self-host/uninstaller?lang=en' -o uninstall_self_host.sh
bash uninstall_self_host.sh --dry-run
# 2. Remove everything, including Docker
bash uninstall_self_host.sh --remove-docker# 1. 下载卸载程序并预览将被删除的内容
curl -fL 'https://portal.oxrecorder.cn/api/self-host/uninstaller?lang=zh' -o uninstall_self_host.sh
bash uninstall_self_host.sh --dry-run
# 2. 删除全部内容(包括 Docker)
bash uninstall_self_host.sh --remove-dockerThe script lists what it will remove and asks you to type RESET to confirm. If other software on the computer uses Docker, run it with --keep-docker instead.